

07-27-2011, 03:31 PM
would be +1, Ass

|
Project Hatch
|
|
07-27-2011, 03:31 PM
would be +1, Ass

07-27-2011, 03:43 PM
Do not grind it if you dont plan on taking points for it.
2020 Ford Raptor
2009 Z06 1986.5 Porsche 928S
07-28-2011, 08:12 PM
Decided to wrap the header tonight.....I completely forgot how much of a pain in the ass this is, especially on a small 4cyl header.
Started with the easiest first, using the Summit Racing brand 1in x 50ft header wrap, its made by DEI and its slightly cheaper, even includes the same DEI instructions. Also those SS Ties I got at NAPA, $7.99 for 10, 11" ties.... ![[Image: 2011-07-28_16-19-56_587.jpg]](https://lh3.googleusercontent.com/--MQIQCwmcSY/TjH1JMht5-I/AAAAAAAABnQ/3_e-XN28wMM/s640/2011-07-28_16-19-56_587.jpg) ![[Image: 2011-07-28_16-20-22_462.jpg]](https://lh4.googleusercontent.com/-WV3y0GqIOQI/TjH1ONPiVXI/AAAAAAAABnU/bYnUeNuRx-o/s640/2011-07-28_16-20-22_462.jpg) Then moved along to each runner... ![[Image: 2011-07-28_16-36-03_792.jpg]](https://lh4.googleusercontent.com/-NzHvknKy5_g/TjH1TyynzZI/AAAAAAAABnc/QRR00W33qTY/s640/2011-07-28_16-36-03_792.jpg) ![[Image: 2011-07-28_16-36-21_35.jpg]](https://lh4.googleusercontent.com/-5c6FBmRarOo/TjH1ZyJjAWI/AAAAAAAABnk/G07igNgleSU/s640/2011-07-28_16-36-21_35.jpg) The 2nd from the right was a bit of a pain due to clearances between the tubes, so i had to go with the 1st on the left and then get creative with the wrap on the trouble tube. ![[Image: 2011-07-28_17-14-31_679.jpg]](https://lh5.googleusercontent.com/-bLpikQKk2n8/TjH1gJV3jrI/AAAAAAAABno/N_4WoJEJet4/s640/2011-07-28_17-14-31_679.jpg) This is a 4-2-1 header, the 2 -1 part I wrapped the 2 tubes together to halfway down the bend. ![[Image: 2011-07-28_18-37-23_829.jpg]](https://lh6.googleusercontent.com/-j2B3432iR3M/TjH1maEHNII/AAAAAAAABnw/Uct1h9csOtw/s640/2011-07-28_18-37-23_829.jpg) Then wrapped the straight section with some remaining 2in wrap all together, hung it up and painted it with the silicon spray paint. ![[Image: 2011-07-28_19-00-03_607.jpg]](https://lh4.googleusercontent.com/-6ezJkb25aN4/TjH1xy33x7I/AAAAAAAABn4/CuYWxrrylu4/s640/2011-07-28_19-00-03_607.jpg) ![[Image: 2011-07-28_18-59-50_429.jpg]](https://lh6.googleusercontent.com/-KRlAJta-QSo/TjH1s1gVaHI/AAAAAAAABn0/dtJSNatDJLM/s640/2011-07-28_18-59-50_429.jpg)
07-29-2011, 07:16 AM
great you can do my header too

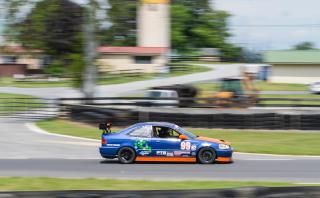
#99 - 2000 Civic Si (Future H2 Car, Former H1 car)
IPGparts.com, AutoFair Honda, Amsoil, QuikLatch Fasteners NASA-MA Tech Inspector (Retired) 
07-29-2011, 07:44 AM
I do not see the moistening agent for the pre-wrap soak.
edit: Always apply a moistening agent before wrapping your pipe. edit2: Doing so will enhance performance. edit3: Use only an approved moistening agent, as ill-suited ones could result in damage to your wrap and affect the long-term health of your pipe.
1987 Oldsmobile Cutlass 442
07-29-2011, 08:08 AM
I've never moistened it, I've realized that when you do it dry, the longer you play with it, the easier it is to work with. And much easier cleanup if you dont moisten it.
Its only "recommended" to moisten it, not required, per the instructions provided from Summit.
07-29-2011, 08:43 AM
that's gonna chafe.
I Am Mike
4 wheels: '01 RAV4 (Formerly '93 Civic CX, '01 S2000, '10 GTI, '09 A4 Avant) 2 wheels: '12 Surly Cross-Check Custom | '14 Trek Madone 2.1 105 | '17 Norco Threshold SL Force 1 | '17 Norco Revolver 9.2 FS | '18 BMC Roadmachine 02 Two | '19 Norco Search XR Steel (Formerly '97 Honda VFR750F, '05 Giant TCR 2, '15 WeThePeople Atlas 24, '10 Scott Scale 29er XT, '11 Cervelo R3 Rival, '12 Ridley X-Fire Red) No longer onyachin.
08-02-2011, 11:48 PM
So update for today. The ricer in me took over!!!!
Decided to pull and paint the VC, it was looking pretty bad, and even though this is a track car, why cant it look good? Plus the VC gasket needed to be replaced anyway. VC pulled, under looks good and clean. ![[Image: 2011-08-02_17-25-53_788.jpg]](https://lh3.googleusercontent.com/-h63UndvuS7U/TjinNjP0tgI/AAAAAAAABqU/_zAavUoiXiM/s640/2011-08-02_17-25-53_788.jpg) Tried to degrease it with brake cleaner, didn't work out to well. ![[Image: 2011-08-02_17-26-15_499.jpg]](https://lh3.googleusercontent.com/-3gC_FUw-P0w/TjiniGEWUXI/AAAAAAAABqk/NoamyTdxv3A/s640/2011-08-02_17-26-15_499.jpg) So Fuggit, here comes the the Aircraft stripper. Bubble Bubble. Do not inhale this stuff, it burns. ![[Image: 2011-08-02_17-31-37_741.jpg]](https://lh4.googleusercontent.com/-zhgEw2Hlmj0/TjinspgNs4I/AAAAAAAABtw/j6fXTFOhz8U/s640/2011-08-02_17-31-37_741.jpg) ![[Image: 2011-08-02_17-31-45_140.jpg]](https://lh3.googleusercontent.com/-JK4LmMBuGQA/Tjin1wYrGlI/AAAAAAAABqw/-yntKrmsojs/s640/2011-08-02_17-31-45_140.jpg) ALL CREAN. ![[Image: 2011-08-02_18-09-17_939.jpg]](https://lh3.googleusercontent.com/-kLQtf95lAnU/Tjin85xroMI/AAAAAAAABq4/Zh7DGhGyU38/s640/2011-08-02_18-09-17_939.jpg) Wiped down with Alcohol and took a brass brush to it to clean it up. I figure its a Honda, so naturally it needs a Red VC. Used VHT Wrinkle finish, apparently this stuff gives you that JDM TYTE look yo. ![[Image: 2011-08-02_18-24-54_475.jpg]](https://lh6.googleusercontent.com/-WLAyLCtDE9c/Tjipdg_DeRI/AAAAAAAABsQ/Kzc05Jm9064/s640/2011-08-02_18-24-54_475.jpg) Calls for three HEAVY coats, each coat using a different pattern, Horizontal, Vertical, and Diagonal spray patterns. Coat 1- ![[Image: 2011-08-02_18-23-50_936.jpg]](https://lh4.googleusercontent.com/--CD8SdBtQzQ/TjioDi6lceI/AAAAAAAABq8/6g3dBDMNk2k/s640/2011-08-02_18-23-50_936.jpg) ![[Image: 2011-08-02_18-24-10_353.jpg]](https://lh3.googleusercontent.com/-lIbfeT2GrYM/TjioVoxsfnI/AAAAAAAABrM/FyNpdGVG4Fw/s640/2011-08-02_18-24-10_353.jpg) Let sit for 5 minutes, then go at it again. ![[Image: 2011-08-02_18-28-26_989.jpg]](https://lh3.googleusercontent.com/-8AzvMuz83nE/TjiocKqCIkI/AAAAAAAABrQ/s6CklZFsnAw/s640/2011-08-02_18-28-26_989.jpg) Coat 3 ![[Image: 2011-08-02_18-36-37_957.jpg]](https://lh6.googleusercontent.com/-PSry0GmgQQE/Tjio0VDcaTI/AAAAAAAABrs/ul3lQT-Eb-8/s640/2011-08-02_18-36-37_957.jpg) I did 4 coats, but all the pictures look the same. Now, this says to not handle it at all for 24 hours, but after 3 hours of drying it started to turn out really nice. ![[Image: 2011-08-02_19-56-11_622.jpg]](https://lh3.googleusercontent.com/-Hl3REDvXEak/Tjio7B-2x4I/AAAAAAAABrw/wtSGUXCHiHI/s640/2011-08-02_19-56-11_622.jpg) ![[Image: 2011-08-02_19-56-28_885.jpg]](https://lh5.googleusercontent.com/-gvWlY64w52Q/TjipF-0JtVI/AAAAAAAABr8/5Tgc2CvpLgs/s640/2011-08-02_19-56-28_885.jpg) ![[Image: 2011-08-02_19-56-18_751.jpg]](https://lh3.googleusercontent.com/-eU9JHWWtZuc/TjipATu1yZI/AAAAAAAABr0/zkRDLvW60w0/s640/2011-08-02_19-56-18_751.jpg) ![[Image: 2011-08-02_19-56-40_510.jpg]](https://lh3.googleusercontent.com/-hplLKWekqh8/TjipX9-ng8I/AAAAAAAABsI/7_C-EQYvObU/s640/2011-08-02_19-56-40_510.jpg) I'm really happy with the results, I think it looks great! RICER!!!!!!!! Said to let it sit for 24 to 48 hours to cure, or bake at 200 degrees for 40 minutes (Casey wasn't having that). Meanwhile as the VC is drying I decided to get started on installing the GCs. ![[Image: 2011-08-02_18-51-43_26.jpg]](https://lh4.googleusercontent.com/-yxKwzyU16bA/TjipjbhCsnI/AAAAAAAABsU/yNMjdsx6tx0/s640/2011-08-02_18-51-43_26.jpg) Now at the same time in going to pull the LCAs to replace them with Integra/EX LCAs which have the hole required to run a front sway bar, where the Endlinks attach. Removed the bolt/nut holding the shock fork to the LCA. ![[Image: 2011-08-02_18-51-58_701.jpg]](https://lh5.googleusercontent.com/-O9vJz_lpCjE/Tjipntuyp5I/AAAAAAAABsY/kcY9kKi5Fs4/s640/2011-08-02_18-51-58_701.jpg) Loosened the bolt that tightens down on the shock. ![[Image: 2011-08-02_18-52-13_215.jpg]](https://lh6.googleusercontent.com/-xWmOp6bFJPI/TjipttIzDtI/AAAAAAAABsg/5fo8Puce6hQ/s640/2011-08-02_18-52-13_215.jpg) These three bolts will remove the LCA. ![[Image: 2011-08-02_18-52-30_366.jpg]](https://lh5.googleusercontent.com/-U7KkdroS9-8/Tjipz_yNocI/AAAAAAAABsk/HpizwCvu31M/s640/2011-08-02_18-52-30_366.jpg) LCA to Knuckle nut. And this is where I ran into a snag, the LCA will not come down off the knuckle, even using my seperator. ![[Image: 2011-08-02_18-53-11_60.jpg]](https://lh4.googleusercontent.com/-jC3IDndr2Mk/Tjip9fQq4NI/AAAAAAAABs0/UcbhoMO-RQQ/s640/2011-08-02_18-53-11_60.jpg) So I will have to pull the Axle from the hub to get a good angle to smack the LCA down with a BFH. However, no 32mm socket in my toolbox to remove the retaining nut for the axle. Final Bolt holding on the LCA. ![[Image: 2011-08-02_18-53-43_764.jpg]](https://lh4.googleusercontent.com/-VyqAie-bm8s/TjiqDIyfKMI/AAAAAAAABs4/O0BZ8xBTkWU/s640/2011-08-02_18-53-43_764.jpg) So the front is on hold. Rear, Piece of damn cake. ![[Image: 2011-08-02_19-29-56_903.jpg]](https://lh5.googleusercontent.com/-_VE_aWXqljY/TjiqIxJdqoI/AAAAAAAABs8/kRE5FtV5qmI/s640/2011-08-02_19-29-56_903.jpg) Remove the lower shock mount bolt from the LCA. and the LCA bolt connecting it to the rear hub. (no pic) ![[Image: 2011-08-02_19-30-06_578.jpg]](https://lh5.googleusercontent.com/-5YyEJb5NY-I/TjiqOCW88UI/AAAAAAAABtE/AIKPIkMIY3w/s640/2011-08-02_19-30-06_578.jpg) Removed the 2 bolts holding the top of the shock in place. slapped the coilover onto the shock. And voila! ![[Image: 2011-08-02_19-55-21_376.jpg]](https://lh3.googleusercontent.com/-wY6BpPRMILg/TjiqS1PTz5I/AAAAAAAABtI/KMwHo-15__c/s640/2011-08-02_19-55-21_376.jpg) Not sure what my ride height will be, varies from 1-4 inches, many people say to start off with it in the middle, but I thought that would have made the car slammed. So once I get the front buttoned up, ill finish it up and see how she sits, with pics of course. KNOCK on wood, not a single bolt gave me a problem, aside from the LCA/Knuckle connection.
08-02-2011, 11:55 PM
Justin - for the lower balljoint (knuckle to LCA) that has you stuck, you can smack the lips of the LCA with a BFH and it should loosen up easily. Just rethread the castle nut back onto the balljoint threads as to not mess them up.
If that sketches you out, you can also jack up the suspension from the LCA or brake rotor, and then take a 1/2 drive ratchet and wedge in btwn the balljoint and LCA. Lower the jack and possibly have someone press down on the rotor as well, and it should pop the balljoint loose from the LCA. I use the first method usually, but had to use the 2nd method tonight on the Hype-R. 
08-03-2011, 07:56 AM
Why didnt you light it on fire?
08-03-2011, 08:57 AM
.RJ Wrote:Why didnt you light it on fire? Im not allowed to be within 500ft of a flame source. Long story, eyebrows were lost.
08-03-2011, 09:25 AM
UG valve covers are the best.
#99 - 2000 Civic Si (Future H2 Car, Former H1 car)
IPGparts.com, AutoFair Honda, Amsoil, QuikLatch Fasteners NASA-MA Tech Inspector (Retired)
08-03-2011, 09:41 AM
I love it, nice write-up with pictures.
2020 Ford Raptor
2009 Z06 1986.5 Porsche 928S 
08-03-2011, 09:56 AM
VC looks phresh yo!
Current
2006 4Runner V8 Limited|| Currently no BRAPS Past 2007 DRZ400S || 2007 SV650 || 1998 Yamaha RT180 || 1998 XJ Sport || 2002 Subaru WRX Wagon || 1998 XJ Classic || 2002 VW Passat Wagon || 1992 F150 Custom
08-03-2011, 09:59 AM
HERRA PHRESH

08-03-2011, 10:08 AM
maybe its earlier in this thread but how are compression and leakdown?
08-03-2011, 10:20 AM
Mike Wrote:compression test (180-160-170-180) Last compression test was done in 06. I'll probably do a compression test on my own, just need to get the kit from my dad, thanks for reminding me. I doubt its far off from that, considering Mikey made it to the track/drove the car maybe once since then. Regardless of results, im driving it til it pops. Then LS7 swap.
08-03-2011, 10:33 AM
JustinG Wrote:Mike Wrote:compression test (180-160-170-180) K24/K20 hybrid?... i guess if you want an LS7 thats cool too... but i'm pretty sure you'll need to up the spring rates and put some big sway bars in it
#99 - 2000 Civic Si (Future H2 Car, Former H1 car)
IPGparts.com, AutoFair Honda, Amsoil, QuikLatch Fasteners NASA-MA Tech Inspector (Retired) |
![[Image: dr.evil.jpg]](http://bradley.chattablogs.com/dr.evil.jpg)