Just going to copy and paste my post from the Acura forums about my hardwire install because I'm too lazy to edit it!
"So here is a little writeup based on what I ran into with the Escort hardwire install. I won't go through the same a-pillar removal step by step as the V1 install thread because it's obviously unnecessary. However, for those who buy the Direct Wire SmartCord this might be helpful.
First of all, this kit uses a 3M connector to tap into an existing wire, it's not designed to plug right into the fuse box, which apparently is dangerous anyway. That's how my buddy caught his old Integra on fire. This does make it a little more confusing because without a wiring diagram you have to figure out which wire is which in a huge bundle of wires next to the fuse box. As seen here: (disclaimer: I took all of these pics with my EVO in low light conditions, so they're not going to be high quality shots)
![[Image: IMAG0062.jpg]](http://img.photobucket.com/albums/v402/WRXTranceformed/IMAG0062.jpg)
Fortunately my buddy had a circuit tester? I don't remember the technical term because I don't do a lot of wiring myself, but it basically allows you to figure out which wire is linked to which circuit by plugging into the source or directly into the particular fuse you want to trace. The wire I wanted to plug into was the rear passenger window so that I had a stealth way to turn the detector off and on by using the window lock switch. I drive up to VA to visit family every now and then, so it was important to me to have a way to do it discreetly.
If you want to hardwire it into the rear passenger window switch to have this ability, you need to splice into the wire that is
yellow and red with a few gray stripes on it. I tried to snap a pic but it didn't come out so where you could see the color, but just remember to look for a yellow wire with red and gray stripes.
![[Image: IMAG0063.jpg]](http://img.photobucket.com/albums/v402/WRXTranceformed/IMAG0063.jpg)
Again, not a great picture, but you can loosen the wire from the bundle and just snap the 3M connector over it, push the male spade connector into it and then make sure the plastic cover is completely over the exposed metal.
![[Image: IMAG0064.jpg]](http://img.photobucket.com/albums/v402/WRXTranceformed/IMAG0064.jpg)
I wanted to install the remote panel similarly to how mmade did his (in the empty button slot near the mirror controls) but I didn't like how you couldn't see the alerts or the panel because of the steering wheel. It was located just where you can't see it. So we switched the VSA switch from the left side to the right.
![[Image: IMAG0065.jpg]](http://img.photobucket.com/albums/v402/WRXTranceformed/IMAG0065.jpg)
After you pop the blank button out, there is a little threshold that we decided to shave down to be flush with the hole opening so that the panel would have a nice tight fit in there and would have a flush look once it was completed.
![[Image: IMAG0066.jpg]](http://img.photobucket.com/albums/v402/WRXTranceformed/IMAG0066.jpg)
Then I pushed the panel through the hole. It is a really tight fit, which is good, but don't be afraid to push it. This was then hot glued in place from behind.
![[Image: IMAG0067.jpg]](http://img.photobucket.com/albums/v402/WRXTranceformed/IMAG0067.jpg)
The finished, flushmounted product

![[Image: IMAG0068.jpg]](http://img.photobucket.com/albums/v402/WRXTranceformed/IMAG0068.jpg)
![[Image: IMAG0071.jpg]](http://img.photobucket.com/albums/v402/WRXTranceformed/IMAG0071.jpg)
To mount the detector here in NC, I will probably use the suction cup mount and have it just to the left of the rear view mirror up in the tint strip to deter thieves. During my trips to VA, it will probably be mounted like this:
![[Image: IMAG0072.jpg]](http://img.photobucket.com/albums/v402/WRXTranceformed/IMAG0072.jpg)
This allows for a good line of site for the detector if I move my visor down just a bit, and the a pillar hides it from side view and from the front it's nearly invisible. With the remote panel, I can operate it in night mode so nothing lights up above the steering wheel for prying eyes to see:
![[Image: IMAG0073.jpg]](http://img.photobucket.com/albums/v402/WRXTranceformed/IMAG0073.jpg)
Hope that helps some of you guys out there who pick up this kit and want a clean DIY install! The biggest challenges we ran into were:
1) Figuring out which wire was the rear passenger window
2) Getting that panel that holds the switches to sit back flush again. I broke one or two of those cheap, shitty clips that holds everything in these cars together so I'm hoping it stays put
Interestingly, my VSA button backlight has been off since I bought the car. After I switched it to the other location it works again! haha"




 It's not huge but it's noticeable enough to me. I guess this gives me an excuse to stop being stingy and get the body stuff painted and get this wheel fixed.




![[Image: IMAG0105.jpg]](http://img.photobucket.com/albums/v402/WRXTranceformed/IMAG0105.jpg)
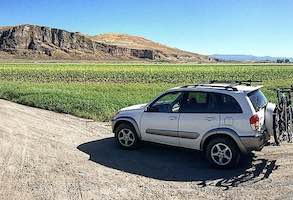
![[Image: supertroop.jpg]](http://thinlinestupid.files.wordpress.com/2010/05/supertroop.jpg)
![[Image: IMAG0147.jpg]](http://img.photobucket.com/albums/v402/WRXTranceformed/IMAG0147.jpg)
![[Image: IMAG0148.jpg]](http://img.photobucket.com/albums/v402/WRXTranceformed/IMAG0148.jpg)
![[Image: XLR8JPIPEPC049896.jpg]](http://i34.photobucket.com/albums/d121/Excelerate/XLR8JPIPEPC049896.jpg)
![[Image: TL-SDyno.jpg]](http://i34.photobucket.com/albums/d121/Excelerate/TL-SDyno.jpg)